
Making Glass Knapping Blanks in a Microwave Kiln
- chelsea0367
- Oct 4, 2024
- 5 min read
Making Large Flintknapping Blanks from Bottle Glass in a Microwave Kiln
By Fritz Reitz
This post builds upon that of Ken Graham at https://www.pugetsoundknappers.com/how_to/Microwave%20Glass.html
Microwave kilns are conventionally used to make small, ¼” thick items from art glass (molten glass spreads on kiln shelf paper until it is about ¼” thick at which point its surface tension prevents further spread). As outlined in Ken Graham’s post, more-readily-available bottle glass can also be melted in a microwave kiln, and kiln shelf paper mounded to form a dam around the glass, allowing the production of thicker blanks.
Here I describe using the lid of the kiln as a mold, allowing yet-larger castings of 4½” in diameter and ¾” thick.
GLASS ART SAFETY NOTE: Glass artists keep band-aids handy. If you are not already an experienced flintknapper and/or glass artist accustomed to breaking glass and/or working with glass shards, don’t try this at home.
SILICOSIS SAFETY NOTE: Breathing in glass powder, silica powder, or dust from ceramic fiber leads to an irreversible lung disease called Silicosis, so wearing a mask is recommended when handling these materials, and stray dust should be rinsed off or captured with a damp paper towel and discarded.
The kiln and its preparation
The kiln used had an outer diameter of 7-5/8”, inner diameter of 4-3/4”-5” (slightly tapered) and the lid was 3-1/4” tall and 1-3/4” deep inside. The base was 1” thick with an approximately 1/4” tall platform in the center, but this platform was not used herein.
The kiln was turned upside down, and the “bottom” and sides of the inverted kiln lid first lined with Ceratex 3170 1/8” thick ceramic fiber paper and then with an additional layer of kiln shelf paper. The fiber paper is stiff enough to bridge the lid’s ventilation hole, but compressible enough to allow the glass blank to be shaken free of the mold after casting. The added shelf paper layer extends the life of the ceramic fiber paper from a few firings to potentially a dozen or more.
Figure: Kiln paper cut to fit the “bottom” and sides of the inverted lid

Figure: 1/8” thick ceramic fiber paper lining the sides of the inverted lid

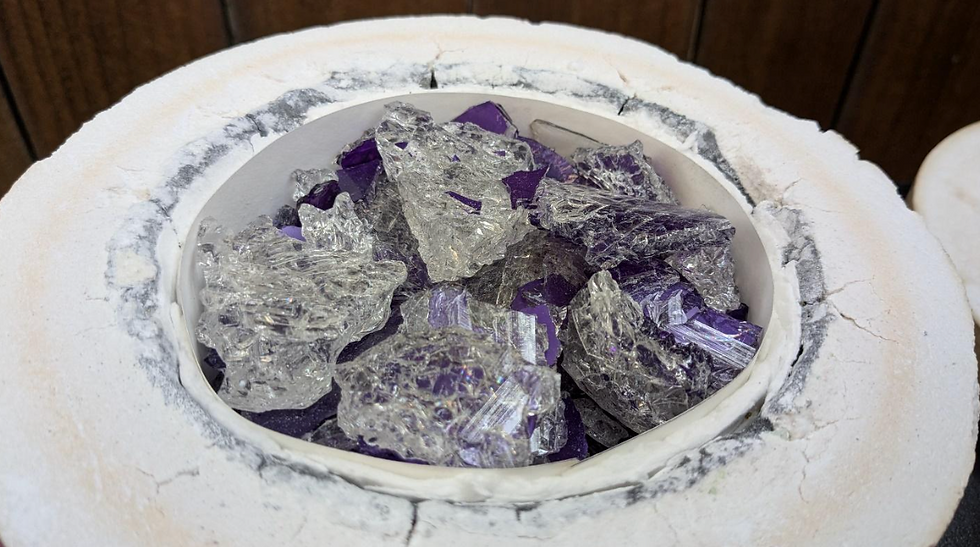
500 grams of crushed glass (see “Footnote: Obtaining the crushed glass” below) were placed in the lined lid and the lid was tapped on the ground and slightly shaken to cause the glass to settle as low and flat as possible. (For the geometry of this particular kiln, 500g was the amount that produced blanks of ¾” thickness. A wider kiln, different desired blank thickness, or glass of substantially different density would require a corresponding adjustment in glass quantity.) The flat side of the “top” (normally the bottom of the kiln’s base) was then placed over the glass, closing the kiln. When the glass is not crushed completely enough, the “top” does not lie flush and seal the kiln, but rather balances on top of the protruding glass, allowing heat to escape until enough glass melts for it to settle into place, thus requiring either additional heating duration or the addition of a ceramic fiber gasket ring to seal the gap for best results.
Figure: Lid lined with ceramic fiber paper and then shelf paper, then filled with 500 g of crushed glass
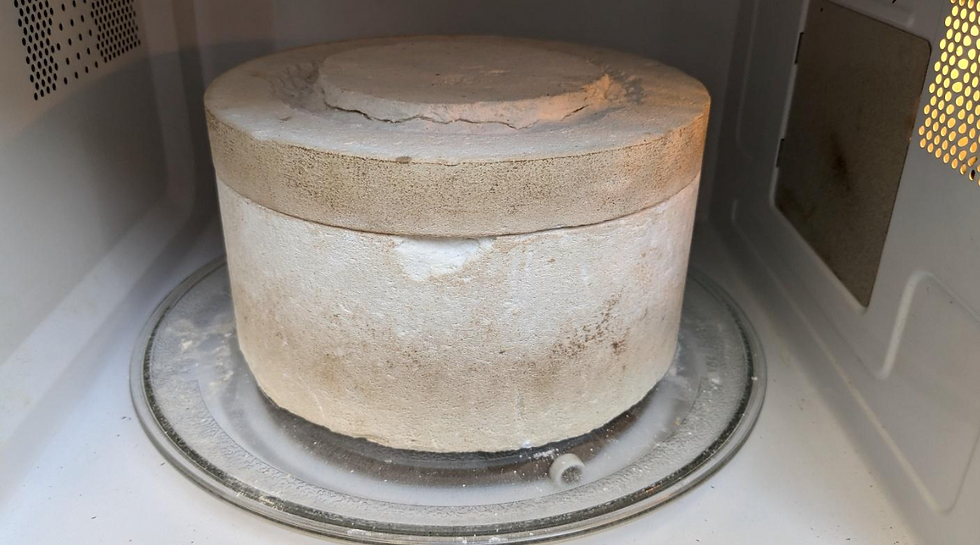
The kiln was then centered in the microwave (a 900W Emerson MW8999RD) and heated at full power for 65 minutes. The oven and kiln were then left undisturbed for 10 or more hours to completely reach ambient temperature with a minimum of thermal stresses inside the glass (the thermal shock of rinsing the dust from even a slightly-warm blank can break it). These durations may vary with different microwaves, kilns, or glasses used.
Figure: The base is set on top as a lid, and the kiln is placed in the microwave.
Results
Figure: Beer bottle glass immediately after removal from the kiln. The ceramic fiber paper is worse for wear, but still has many re-uses left, and the excess shelf paper has collapsed onto the top of the glass.

Figure: After the glass is dumped out of the kiln, it is heavily dusted with kiln shelf paper and hazardous-if-inhaled ceramic fiber paper residue (see SILICOSIS SAFETY NOTE above). Once the glass is 100% cooled to ambient temperature this dust should be rinsed away. (Rinsing still-warm glass risks breaking it from thermal shock.)

Figure: Blanks post-rinsing

Figure: Example resulting point from beer-bottle glass

Footnote: Obtaining the crushed glass
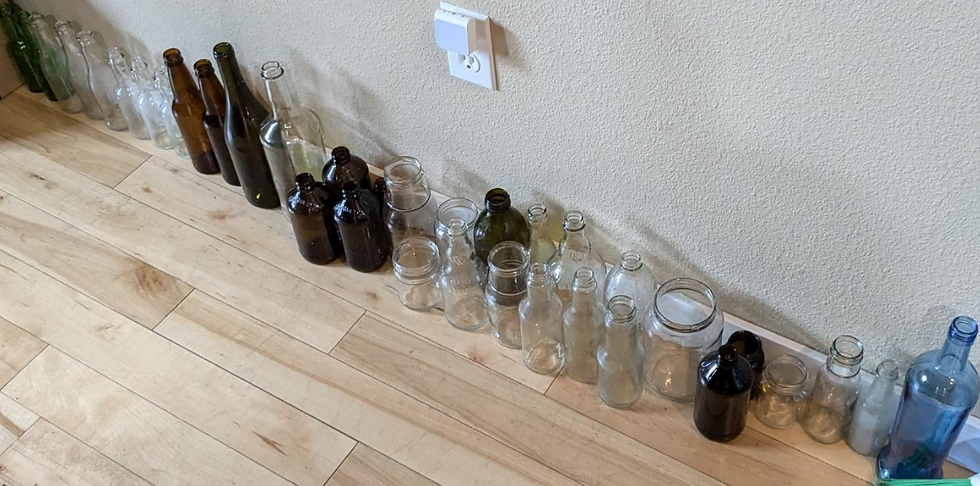
Glass was taken from (a) a recycle bin, including bottles and jars of varying colors, and (b) glass vases from Goodwill. Most paper labels came off easily after a few hours of soaking in water, some required additional scraping with a razor blade and a more aggressive solvent such as Goo Gone. Removing the labels is not absolutely required, as they tend to be burnt away at molten-glass temperatures, though were removed in this case to maximize glass purity.
Figure: Recycling-bin glass
Glasses of different compositions can have different expansion and annealing properties such that when they are melted together and then cooled, stresses are created inside the glass. These stresses can be severe enough to cause the glass to break before it cools all the way back to room temperature. Therefore, when possible, bottles from the same product were grouped together to minimize the likelihood of glass incompatibility.
Figure: Brand-matched bottles in a “gopher bag”

The bottles were then “crazed” (cracked throughout) by placing them in a 5-gallon stainless steel mesh bag (sold as gopher-proofing of plant roots) and heated in a conventional oven to 550 degrees F before lowering into a bucket of ambient-temperature water.
SAFETY NOTE: Elbow-length welding gloves are used to avoid contact with the hot mesh/glass, and if submerged faster than steam can escape, the bottle can “pop”, which, underwater in a mesh bag, is usually merely startling, but does call for PPE (personal protective equipment) such as goggles and said gloves.
Figure: Making the glass as hot as possible in a conventional oven (typically 550F) before dunking in water

The bottles could then be relatively easily broken into small pieces by placing them in a bucket and tapping and/or mashing them with a hammer or similar tool.
SAFETY NOTE: Again, breathing in glass powder leads to an irreversible lung disease called Silicosis, so wearing a mask is recommended any time glass is being pulverized. This is best done while the glass is still wet to help contain any glass powder created. Also, small, razor-sharp chips of glass invariably escape the bucket during this process, so doing this outside and with PPE is still necessary.
Acknowledgements
Thanks to Tyler Doyle for the microwave kiln, Pat Bishoff for the microwave, and the rest of the Nighthawk Naturalist Flintknapping Club for testing multiple previous attempts at large bottle-glass blanks.
Comments